Sustainable Style: 6 DIY Projects for High-End Looks Under $20
Advertisement
Achieve sustainable style on a budget by transforming your wardrobe with innovative DIY projects, enabling you to recreate high-end fashion looks for under $20 in 2026, embracing both affordability and environmental responsibility.
Embracing sustainable style on a budget has become more than just a trend; it’s a conscious lifestyle choice that allows fashion enthusiasts to express their individuality without breaking the bank or harming the planet. In 2026, the emphasis on eco-friendly practices and creative reuse is stronger than ever, offering exciting opportunities to recreate high-end looks for under $20 through imaginative DIY projects.
The rise of sustainable fashion: why DIY is key
The fashion industry has long been a major contributor to environmental degradation, from excessive water consumption to textile waste. However, a growing movement toward sustainability is reshaping how we think about our wardrobes. This shift isn’t just about opting for ethically produced goods; it’s also about extending the life of existing garments and creating new pieces from old ones.
Advertisement
DIY fashion is at the forefront of this revolution, empowering individuals to take control of their style while minimizing their ecological footprint. By transforming what you already own or sourcing materials affordably, you can achieve unique, personalized looks that rival designer pieces, all while adhering to a budget.
Understanding the impact of fast fashion
Fast fashion, characterized by rapid production cycles and low prices, encourages constant consumption and disposable clothing. This model has severe environmental consequences, including:
- Resource depletion: Enormous amounts of water and energy are used in manufacturing.
- Pollution: Dyes and chemicals contaminate waterways and soil.
- Waste generation: Millions of tons of textiles end up in landfills annually.
- Ethical concerns: Often involves poor labor practices in developing countries.
Choosing DIY projects allows you to actively counteract these negative impacts, transforming old items into new treasures. This approach fosters creativity and a deeper appreciation for your clothing, moving away from a disposable mindset.
Advertisement
The allure of sustainable fashion goes beyond environmental benefits; it also offers a unique opportunity for personal expression. Crafting your own garments or accessories means your style is truly yours, reflecting your personality and values. This bespoke approach ensures that your wardrobe stands out, telling a story of thoughtful creation rather than mass production. Moreover, the sense of accomplishment derived from completing a DIY project adds another layer of satisfaction, making your fashion choices even more meaningful.
Project 1: upcycled denim transformation
Denim is a wardrobe staple, but old jeans often end up discarded. With a little creativity, you can transform a pair of worn-out jeans or a denim jacket into a stylish, high-end piece. This project is incredibly versatile and can be adapted to various aesthetics, from bohemian chic to edgy streetwear. The key is to see the denim as a blank canvas waiting for a personal touch.
The beauty of upcycled denim lies in its durability and timeless appeal. Instead of buying new, consider visiting thrift stores for oversized denim jackets or jeans that can be cut, patched, or embellished. This not only saves money but also gives a second life to garments that might otherwise contribute to textile waste.
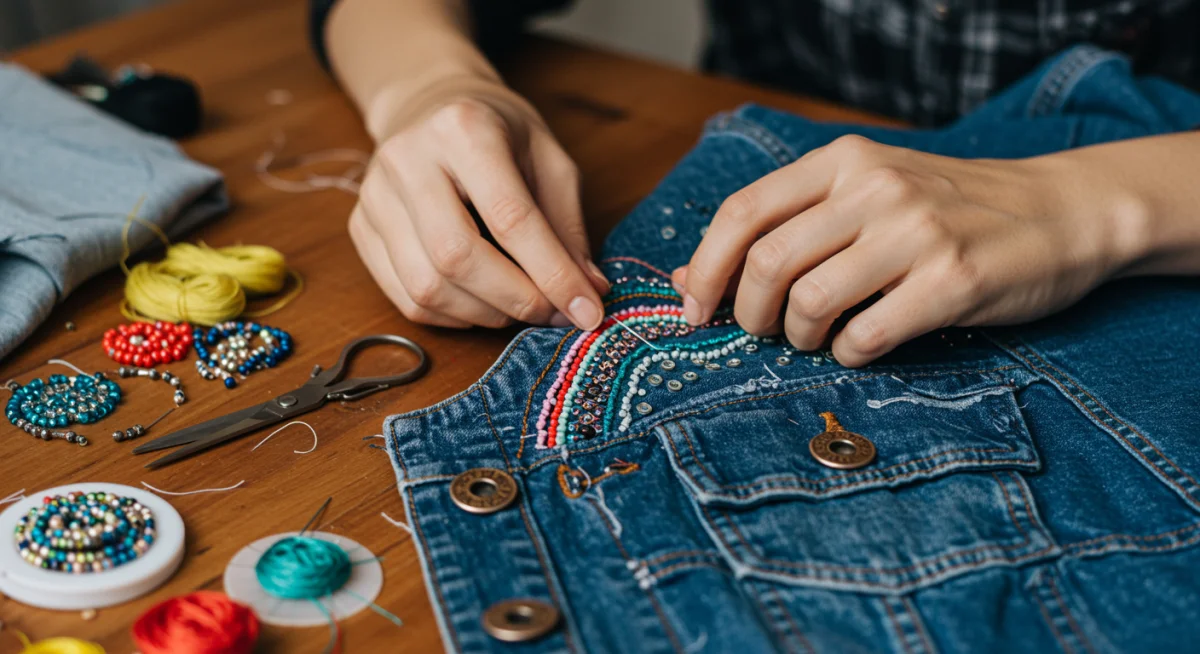
Embellished denim jacket with intricate embroidery
Turn a plain denim jacket into a statement piece with embroidery. You can find embroidery floss and needles for a few dollars at any craft store. Look for inspiration from designer collections that feature maximalist embroidery or subtle, artistic patterns. You don’t need to be an expert; simple stitches can create a stunning effect.
- Materials needed: Old denim jacket, embroidery floss (various colors), embroidery needle, fabric marker (optional).
- Process:
- Wash and dry the jacket.
- Sketch your design lightly with a fabric marker or freehand stitch.
- Begin embroidering, using different stitch types for texture (e.g., running stitch, satin stitch, French knots).
- Focus on cuffs, collars, or the back panel for a dramatic effect.
This project allows for endless customization. You can incorporate beads, sequins, or even small fabric patches to add more dimension and a truly unique touch. The result is a jacket that looks custom-made and high-fashion, all for a fraction of the cost of a designer equivalent. The process itself is therapeutic and rewarding, turning a simple garment into a work of art.
Project 2: bespoke t-shirt redesigns
T-shirts are ubiquitous, often accumulating in our closets until they are deemed too old or unfashionable. Instead of discarding them, consider giving them a new lease on life through creative redesigns. This project is perfect for beginners and offers immediate gratification, transforming basic tees into stylish, contemporary garments that reflect current trends.
The versatility of a plain t-shirt makes it an ideal candidate for DIY transformations. From simple cuts to elaborate fabric painting, the possibilities are vast. This project not only saves money but also encourages a more thoughtful approach to clothing consumption, promoting the idea that fashion can be fluid and ever-evolving rather than static.
Tie-dye and fabric paint masterpieces
Tie-dye has made a huge comeback, and fabric paint offers endless possibilities for custom designs. You can purchase tie-dye kits or fabric paints for under $10. Experiment with different folding techniques for tie-dye, or use stencils and freehand painting for graphic tees that mimic expensive streetwear brands.
- Materials needed: Old cotton t-shirts, tie-dye kit or fabric paints, brushes, rubber bands (for tie-dye), protective gloves.
- Process for tie-dye:
- Wet the t-shirt and wring out excess water.
- Fold or scrunch the t-shirt into your desired pattern and secure with rubber bands.
- Apply dyes according to kit instructions.
- Let it sit for the recommended time, then rinse and wash.
- Process for fabric paint:
- Lay the t-shirt flat and place a piece of cardboard inside to prevent bleed-through.
- Sketch your design or use stencils.
- Apply fabric paints, allowing each layer to dry if necessary.
- Heat-set the paint as per product instructions for durability.
These techniques allow you to create vibrant, artistic pieces that are far from ordinary. Imagine a hand-painted abstract design or a carefully tie-dyed pattern that makes a bold statement. The beauty is that each piece will be unique, reflecting your personal artistic flair. This project is particularly satisfying as it transforms a mundane item into a wearable piece of art.
Project 3: statement jewelry from everyday items
High-end jewelry can be incredibly expensive, but you can create equally stunning pieces using readily available and inexpensive materials. This project taps into the current trend of chunky, bold accessories and allows you to experiment with different textures and colors. The goal is to replicate the luxurious feel of designer jewelry without the hefty price tag.
The secret to successful DIY jewelry lies in selecting materials that can be easily manipulated and combined to create a cohesive design. Think about what elements catch your eye in expensive pieces and how you can mimic those aesthetics with budget-friendly alternatives. The result is not just a piece of jewelry, but a conversation starter.
Polymer clay earrings and beaded necklaces
Polymer clay is an incredibly versatile material that can be molded, cut, and baked to create intricate shapes. A pack of polymer clay costs under $15 and can yield multiple pairs of earrings. For necklaces, repurpose old beads from broken jewelry or buy inexpensive bead strands.
- Materials needed: Polymer clay, earring findings (hooks, jump rings), jewelry pliers, baking sheet, old beads, string/wire.
- Process for polymer clay earrings:
- Condition the clay by kneading it until soft.
- Shape the clay into desired designs (e.g., geometric shapes, abstract forms).
- Bake according to package instructions.
- Once cooled, attach earring findings using jump rings and pliers.
- Process for beaded necklaces:
- Gather an assortment of old beads or purchase new ones.
- Thread beads onto a durable string or jewelry wire, experimenting with patterns and color combinations.
- Secure the ends with crimp beads and a clasp.
By mimicking the designs and color palettes of high-end brands, you can create pieces that look like they came straight from a boutique. Imagine oversized geometric earrings in earthy tones or a multi-strand necklace with repurposed vintage beads. These pieces not only elevate your outfits but also showcase your creative prowess, proving that luxury can be handcrafted.
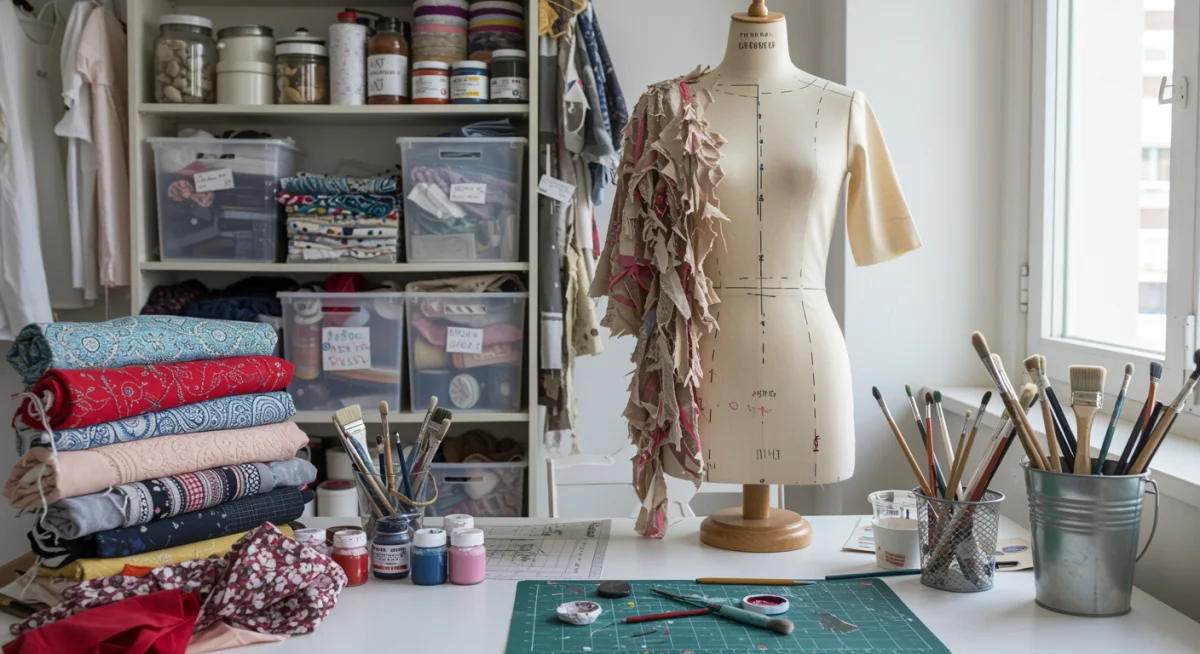
Project 4: fabric painting and distressing for unique garments
Transforming plain garments into unique, artistic pieces through fabric painting and distressing is an excellent way to achieve a high-end, custom look on a budget. This approach allows for incredible personalization, turning a simple item into a wearable piece of art. The beauty of these techniques lies in their ability to mimic designer aesthetics that often feature hand-painted details or perfectly distressed finishes.
Fabric painting opens up a world of creative possibilities, allowing you to add intricate designs, abstract patterns, or even bold statements to your clothing. Distressing, on the other hand, gives garments a lived-in, vintage feel that is highly sought after in contemporary fashion. Combining these methods can result in truly one-of-a-kind pieces.
Hand-painted patterns and artful distressing
Fabric paints are affordable and come in a wide range of colors. You can create intricate patterns, abstract splatters, or even replicate famous artworks on your clothing. For distressing, all you need are a few basic tools to achieve that perfectly worn-in look that often fetches high prices in designer stores.
- Materials needed: Fabric paints, brushes, stencils (optional), old jeans or jackets, sandpaper, razor blade, tweezers.
- Process for fabric painting:
- Prepare your garment by washing and drying it.
- Place cardboard inside to prevent paint bleed.
- Apply paint using brushes, stencils, or even sponges for different textures.
- Allow to dry completely and heat-set if required.
- Process for distressing:
- Mark areas where you want distressing (knees, pockets, cuffs).
- Use sandpaper to thin the fabric, creating faded areas.
- Carefully use a razor blade to make small horizontal cuts, then use tweezers to pull out vertical threads to create frayed holes.
The combination of hand-painted elements and strategically distressed areas can give a garment a truly unique and expensive look. Imagine a pair of jeans with subtle hand-painted floral motifs on one leg, paired with artfully frayed hems. This fusion of techniques creates a dynamic visual interest that is both fashionable and personal. It’s about creating depth and character in your clothing, making each piece tell its own story.
Project 5: customized bags and accessories
Bags and accessories are crucial for completing any outfit, but designer versions can be prohibitively expensive. With a little creativity and a small budget, you can transform plain, inexpensive bags or create new ones from scratch using repurposed materials. This project offers a fantastic opportunity to personalize your essentials and make a strong style statement.
The goal is to elevate a basic item into something that looks high-end and unique. Think about the details that make designer bags stand out: unique textures, interesting hardware, or bespoke embellishments. These elements can often be replicated or mimicked using readily available and affordable supplies, ensuring your customized piece looks anything but cheap.
Hand-painted canvas totes and embellished clutches
A plain canvas tote bag can be purchased for a few dollars and transformed into a stylish accessory with fabric paint, embroidery, or appliqué. For clutches, consider repurposing an old fabric clutch or even a sturdy placemat. Adding beads, sequins, or unique hardware can elevate its look dramatically.
- Materials needed: Canvas tote bag or old fabric clutch, fabric paints, brushes, embroidery floss, beads, sequins, fabric glue, repurposed jewelry pieces.
- Process for hand-painted totes:
- Lay the tote flat and insert cardboard.
- Sketch your design or freehand paint.
- Use fabric paints to create patterns, abstract art, or personalized text.
- Allow to dry and heat-set.
- Process for embellished clutches:
- Clean the clutch if repurposing.
- Plan your embellishment design.
- Use fabric glue to attach beads, sequins, or small fabric cutouts.
- Consider adding a small chain or a repurposed brooch for a touch of luxury.
Imagine a canvas tote adorned with a vibrant, hand-painted botanical design, or an old clutch transformed with intricate beadwork and a vintage-inspired clasp. These customized pieces not only serve their functional purpose but also act as powerful fashion statements, showcasing your individuality and commitment to sustainable practices. They prove that you don’t need a designer label to carry a piece that exudes sophistication.
Project 6: repurposing textiles into chic home decor and wearables
Beyond direct garment alteration, repurposing textiles into new and unexpected forms is a highly sustainable and creative way to enhance your style and living space. This project focuses on seeing the potential in discarded fabrics, transforming them into items that are both functional and aesthetically pleasing. It’s about reimagining materials and giving them a completely new purpose, pushing the boundaries of what constitutes fashion and decor.
The beauty of repurposing textiles lies in the vast array of materials available, from old bedsheets and curtains to worn-out clothing. Each fabric has its own unique texture, print, and history, offering endless possibilities for creative transformation. This approach not only reduces waste but also infuses your style and home with unique, handcrafted elements that tell a story.
From old scarves to headbands and wall art
Old scarves, especially those with interesting prints or luxurious textures, can be easily repurposed into stylish headbands, hair ties, or even unique wall art. Similarly, fabric scraps from other projects can be pieced together to create patchwork accessories or small decorative items. This minimizes waste and maximizes the creative potential of every piece of material.
- Materials needed: Old scarves, fabric scraps, sewing machine or needle and thread, elastic (for headbands), embroidery hoops (for wall art), fabric glue.
- Process for headbands/hair ties:
- Cut scarves into strips of desired width.
- Fold and sew edges to create clean seams.
- For headbands, insert elastic into one end and sew to create a loop.
- For hair ties, simply tie the fabric into a bow or knot around an elastic band.
- Process for fabric wall art:
- Select a visually appealing section of an old scarf or piece together fabric scraps.
- Stretch and secure the fabric within an embroidery hoop.
- Trim excess fabric from the back.
- Hang individually or in a cluster for a gallery wall effect.
Imagine a vibrant silk scarf transformed into a chic, knotted headband that adds a pop of color to your outfit, or a collection of beautifully patterned fabric scraps arranged within embroidery hoops to create a unique piece of wall art. These projects demonstrate how discarded textiles can be given a second life, becoming stylish additions to both your personal wardrobe and your home decor. It’s a testament to the power of creative reuse, proving that true style is often born from ingenuity and sustainability.
| DIY Project | Budget-Friendly Transformation |
|---|---|
| Upcycled Denim | Embellish old jeans or jackets with embroidery for a custom, high-end look. |
| T-shirt Redesigns | Transform plain tees with tie-dye or fabric paint into unique, artistic garments. |
| Statement Jewelry | Create bespoke earrings and necklaces using polymer clay and repurposed beads. |
| Customized Bags | Elevate simple canvas totes or clutches with paint, embroidery, and embellishments. |
Frequently asked questions about sustainable DIY fashion
For sustainable DIY fashion, prioritize materials like old denim, cotton t-shirts, scarves, and fabric scraps. Look for natural fibers such as cotton, linen, wool, and silk, which are biodegradable and often more durable. Thrift stores and existing wardrobes are excellent sources for these affordable, eco-friendly materials.
To achieve a high-end look, focus on clean finishes, attention to detail, and quality embellishments. Research current trends for inspiration on color palettes and design elements. Practice your techniques, invest in good quality tools (even if inexpensive), and don’t rush the process. Small details make a big difference.
Absolutely! YouTube channels, craft blogs, and online courses offer a wealth of tutorials for various DIY fashion techniques, from basic sewing to advanced embellishment. Websites like Pinterest also provide endless visual inspiration and step-by-step guides. Local community centers sometimes offer workshops as well.
Choosing DIY significantly reduces environmental impact by diverting textiles from landfills, conserving resources like water and energy used in new production, and minimizing pollution from dyes and chemicals. It promotes a circular economy model, extending the lifespan of clothing and reducing overall consumption, fostering a more sustainable approach to fashion.
Yes, absolutely. The key is sourcing materials creatively, often from thrift stores, dollar stores, or by repurposing items you already own. Embellishments like embroidery floss, fabric paint, and small beads can be purchased affordably. With careful planning and resourcefulness, each project is designed to stay well within the $20 budget.
Conclusion
Embracing sustainable style on a budget through DIY projects is a powerful way to redefine your relationship with fashion. It allows you to create unique, high-end looks for under $20, transforming old items into new treasures while significantly reducing your environmental footprint. In 2026, the focus on conscious consumption and creative reuse continues to grow, making these projects not just a trend but a vital part of a more sustainable future. By investing your creativity rather than excessive funds, you contribute to a fashion landscape that is both stylish and responsible.


