Upcycle Your Electronics: 5 DIY Decor Ideas for Your Home This Year
Advertisement
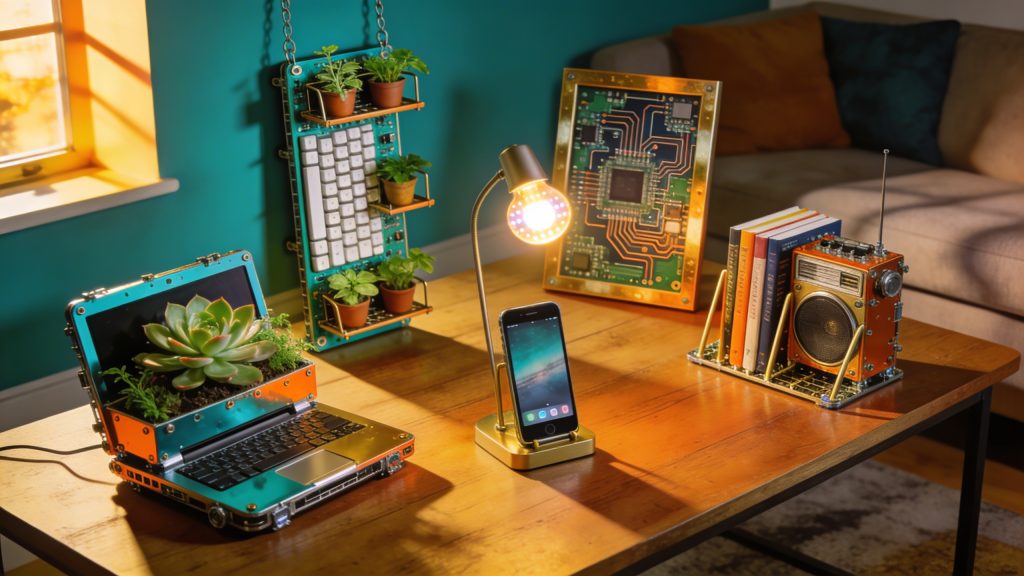
Repurposing old electronics is gaining traction as a sustainable decor trend. This year, innovative DIY projects are transforming e-waste into functional art. Discover practical solutions to creatively integrate technology into your home’s aesthetic.
The movement to Upcycle Your Electronics: 5 DIY Decor Ideas for Your Home This Year (PRACTICAL SOLUTIONS) is not just a passing trend; it’s a significant shift towards sustainable living and creative expression. As technology advances, countless electronic devices become obsolete, often ending up in landfills. This presents a unique opportunity for homeowners and DIY enthusiasts to reimagine these discarded items as valuable, aesthetically pleasing additions to their living spaces. The emphasis is on practical, achievable projects that offer both environmental benefits and a touch of personal flair.
Embracing the concept of upcycling electronics means looking beyond their initial function and envisioning their potential as decorative or utilitarian objects. From old circuit boards to vintage monitors, the possibilities are vast. This guide explores five distinct and actionable ideas designed to inspire you to Upcycle Your Electronics: 5 DIY Decor Ideas for Your Home This Year (PRACTICAL SOLUTIONS), proving that sustainability and style can indeed go hand-in-hand. Each idea provides a clear pathway to transforming what might be considered junk into cherished home accents.
Upcycle Your Electronics: 5 DIY Decor Ideas for Your Home This Year (PRACTICAL SOLUTIONS)
As the volume of electronic waste continues to grow globally, finding innovative ways to reuse and repurpose old gadgets has become critical. This drive towards sustainability has sparked a creative movement, encouraging individuals to rethink their discarded devices.
The focus is on transforming these items into functional and decorative pieces that enhance home aesthetics while minimizing environmental impact. Our exploration into how to Upcycle Your Electronics: 5 DIY Decor Ideas for Your Home This Year (PRACTICAL SOLUTIONS) offers concrete steps for anyone looking to contribute positively to this trend.
Advertisement
These practical solutions not only reduce waste but also provide unique, conversation-starting pieces for your home. They represent a blend of environmental consciousness and artistic ingenuity, proving that old technology can have a vibrant second life.
Transforming Old Hard Drives into Unique Clocks
Old computer hard drives, with their intricate internal mechanisms and sleek metallic casings, offer an excellent foundation for stylish, functional decor. Their robust design and often polished surfaces make them ideal candidates for repurposing into timepieces.
This DIY project provides a sophisticated way to Upcycle Your Electronics: 5 DIY Decor Ideas for Your Home This Year (PRACTICAL SOLUTIONS), resulting in a striking wall or desk clock. The process involves minimal tools and can be completed by most DIY enthusiasts, regardless of extensive experience.
Advertisement
The aesthetic appeal of a hard drive clock lies in its industrial-chic vibe, perfect for modern or minimalist interiors. It’s a testament to how discarded tech can become a focal point, merging utility with artistic expression in an unexpected manner.
Disassembly and Preparation for Hard Drive Clocks
The first step involves carefully disassembling the hard drive to expose its platters and read/write heads. Ensure all data is securely wiped before beginning this process, as a precautionary measure.
Once opened, the internal components can be cleaned and prepared for the clock mechanism. This preparation is crucial for a clean, professional finish when you Upcycle Your Electronics: 5 DIY Decor Ideas for Your Home This Year (PRACTICAL SOLUTIONS).
Integrating the Clock Mechanism
A standard quartz clock movement can be easily fitted into the center of the hard drive platter. Many DIY kits are available that include the mechanism, hands, and mounting hardware.
The hands can be mounted directly onto the platter, utilizing the existing central hole. This method ensures a secure and aesthetically pleasing integration, creating a functional piece of art.
- Carefully remove hard drive casing screws.
- Extract platters and read/write heads.
- Clean components thoroughly before assembly.
- Attach a small, silent clock mechanism.
Repurposing Computer Towers as Planters
Desktop computer towers, often bulky and quickly outdated, possess a surprising potential for transformation into unique planters. Their spacious interiors and sturdy metal frames are perfectly suited for housing various plants, from succulents to small herbs.
This method offers an innovative and green way to Upcycle Your Electronics: 5 DIY Decor Ideas for Your Home This Year (PRACTICAL SOLUTIONS), bringing a touch of nature into your tech-inspired decor. It’s an excellent project for those seeking to blend industrial design with organic elements.
Converting a computer tower into a planter not only reduces e-waste but also adds an unexpected, modern twist to traditional gardening. The result is a conversation-starting piece that celebrates both technology and nature.
Preparing a computer tower for use as a planter requires a few modifications to ensure proper drainage and plant health. The internal components must be completely removed, leaving an empty shell.
Drilling drainage holes in the bottom of the case is essential to prevent waterlogging. Lining the interior with a waterproof membrane or plastic sheet can further protect the metal from rust and corrosion, ensuring longevity for your upcycled creation.
Once prepared, the tower can be filled with potting mix and your chosen plants. Consider adding a layer of gravel at the bottom for enhanced drainage. This creative approach to Upcycle Your Electronics: 5 DIY Decor Ideas for Your Home This Year (PRACTICAL SOLUTIONS) turns an obsolete item into a thriving mini-garden, perfect for any indoor space.
Crafting Artistic Lamps from Circuit Boards
Circuit boards, with their intricate patterns of copper traces and tiny components, are inherently beautiful, miniature cityscapes of technology. They offer a fantastic raw material for creating visually stunning and endlessly customizable lighting fixtures.
This project allows for significant artistic freedom, enabling you to design lamps that range from subtle accent lighting to bold statement pieces. It’s a brilliant way to Upcycle Your Electronics: 5 DIY Decor Ideas for Your Home This Year (PRACTICAL SOLUTIONS), transforming complex internal workings into elegant external displays.
The translucent quality of some circuit boards, especially when backlit, creates a mesmerizing glow that adds a futuristic touch to any room. These lamps are not just sources of light; they are pieces of art that tell a story of technological evolution.
Assembling Circuit Board Panels
To create a circuit board lamp, individual boards can be cut and arranged into panels or cubes. These panels will form the lampshade, allowing light to filter through their unique patterns.
Securing the circuit boards together using clear epoxy or small metal brackets ensures structural integrity. This meticulous assembly process is key to achieving a polished final product.
Integrating LED Lighting
LED strip lights or small LED bulbs are ideal for illuminating circuit board lamps due to their low heat emission and energy efficiency. They can be placed strategically within the structure to highlight the board’s details.
The choice of LED color can dramatically change the lamp’s mood, from a cool blue glow to a warm amber. This personalized lighting enhances the artistic appeal, making it a compelling way to Upcycle Your Electronics: 5 DIY Decor Ideas for Your Home This Year (PRACTICAL SOLUTIONS).
- Cut circuit boards into desired shapes.
- Join pieces with clear adhesive or fasteners.
- Install low-heat LED lighting strips.
- Ensure stable power connection and switch.
Vintage Monitor Pet Beds: A Cozy Retro Retreat
Old CRT monitors, while relics of a bygone era, possess a surprising charm and a sturdy, spacious shell that can be lovingly converted into a cozy pet bed. This project offers a truly unique and nostalgic way to Upcycle Your Electronics: 5 DIY Decor Ideas for Your Home This Year (PRACTICAL SOLUTIONS), providing a comfortable haven for your furry friends.
The distinctive shape and robust construction of these monitors make them perfect for creating a retro-themed resting spot. It’s an innovative solution that combines practical pet care with sustainable design, giving a new purpose to what would otherwise be considered junk.
Transforming a vintage monitor into a pet bed is a rewarding endeavor that results in an eye-catching piece of furniture. It celebrates the aesthetics of older technology while offering a warm, inviting space for pets, making it an ideal choice for the environmentally conscious pet owner.
Safety First: Disassembling CRT Monitors
Before beginning this project, it is crucial to understand that CRT monitors contain high-voltage components that can be dangerous if not handled correctly. Always discharge the capacitor before disassembling to avoid electric shock.
Once safely discharged, carefully remove all internal electronic components, leaving only the monitor casing. This step ensures the safety of both the creator and the future occupant of the pet bed.
Customizing the Interior for Comfort
With the casing empty, the next step involves customizing the interior to make it comfortable for a pet. This includes sanding any rough edges and painting the interior if desired.
Adding a soft cushion or a small, plush bed insert completes the transformation. The monitor’s opening acts as an entrance, creating a private and secure space for pets to relax and sleep, truly enhancing the effort to Upcycle Your Electronics: 5 DIY Decor Ideas for Your Home This Year (PRACTICAL SOLUTIONS).
For more detailed safety instructions on handling CRTs, consult resources like iFixit’s guide on safely discharging a CRT.
Creating Artistic Wall Art from CDs and DVDs
Discarded CDs and DVDs, with their iridescent surfaces and reflective qualities, are often overlooked as potential art materials. However, their unique properties can be harnessed to create dazzling, mosaic-like wall art that captures and refracts light beautifully.
This project is an accessible and visually rewarding way to Upcycle Your Electronics: 5 DIY Decor Ideas for Your Home This Year (PRACTICAL SOLUTIONS), transforming old media into vibrant, dynamic decorative pieces. It requires minimal cost and offers endless creative possibilities for design and color.
The shimmering effect of CD/DVD art adds a touch of modern glamor and visual interest to any wall. It’s an eco-friendly craft that turns digital waste into tangible beauty, reflecting a commitment to both art and sustainability.
Preparing and Cutting Discs for Mosaics
To create CD/DVD wall art, the discs first need to be cut into smaller, irregular pieces. This can be done with strong scissors or a craft knife, taking care to wear protective eyewear.
The varied sizes and shapes of the cut pieces will contribute to the mosaic’s texture and light-reflecting properties. This preparation is a crucial step in ensuring your Upcycle Your Electronics: 5 DIY Decor Ideas for Your Home This Year (PRACTICAL SOLUTIONS) project achieves its desired artistic effect.
Arranging and Adhering Pieces to a Canvas
Once the pieces are cut, they can be arranged and glued onto a canvas or wooden board. Experiment with different patterns and orientations to maximize the reflective qualities and create interesting designs.
Using a strong adhesive suitable for plastics and porous surfaces will ensure the mosaic remains intact. The finished piece will serve as a radiant focal point, showcasing the unexpected beauty of discarded technology.
For more inspiration on creative ways to reuse old tech, explore other DIY projects at our DIY Hacks section. This dedicated space provides a wealth of ideas for transforming everyday objects into extraordinary decor, including how to Upcycle Your Electronics: 5 DIY Decor Ideas for Your Home This Year (PRACTICAL SOLUTIONS).
Perspectives
The trend to Upcycle Your Electronics: 5 DIY Decor Ideas for Your Home This Year (PRACTICAL SOLUTIONS) represents more than just a fleeting craft fad; it signifies a growing public awareness regarding environmental sustainability and the lifecycle of consumer goods. As technology continues its rapid evolution, the imperative to manage e-waste responsibly intensifies. These DIY decor ideas offer tangible, immediate ways for individuals to participate in this broader ecological effort, transforming personal consumption habits into creative contributions. The ongoing development of new upcycling techniques and materials will undoubtedly broaden the scope of what is possible, encouraging even more innovative design from discarded tech. This movement isn’t just about decor; it’s about fostering a culture of reuse and resourcefulness in an increasingly digital world.


